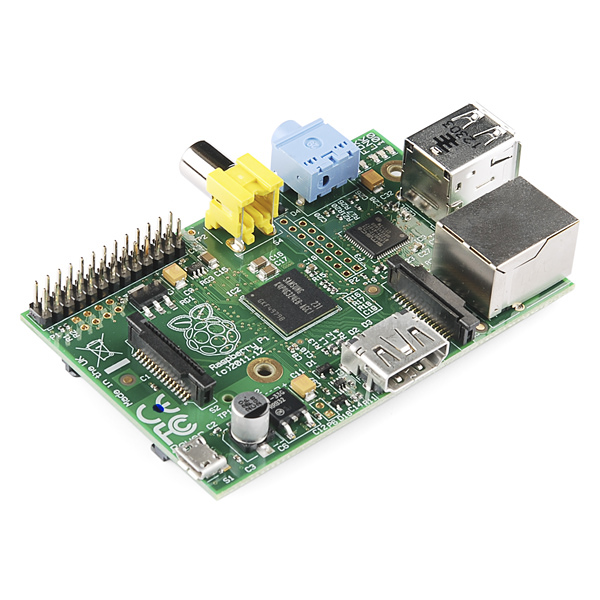
I'm gonna share how to create debian system on Raspberry PI rev B.

1. Cross-toolchains
Download the toolchains from https://github.com/raspberrypi/tools/archive/master.zip
extract somewhere in your home directory, mostly people put the toolchains on /opt directory.
Export the toolchains path to your working environment like this:
export PATH:$PATH:
test your toolchains by typing:
arm-linux-gnueabihf-gcc --version
2. Kernel Source
install git
> apt-get install git
get kernel source
> git init
> git fetch git://github.com/raspberrypi/linux.git rpi-3.6.y:refs/remotes/origin/rpi-3.6.y
> git checkout rpi-3.6.y
You got kernel source,the kernel you're going to create is two, one is the kernel.img as normal kernel and kernel_emergency.img for somekind of failsafe rescue system.
2.1 Kernel Emergency
To create kernel_emergency, you should download the target_fs of first from:
https://github.com/raspberrypi/target_fs
extract with name target_fs same level as linux-rpi-3.6.y, the kernel source will get those filesystem.
> make ARCH=armhf CROSS_COMPILE=arm-linux-gnueabihf bcmrpi_emergency_defconfig
> make ARCH=armhf CROSS_COMPILE=arm-linux-gnueabihf all
> cp arch/arm/boot/zImage kernel_emergency.img
2.2 Kernel
> make ARCH=armhf CROSS_COMPILE=arm-linux-gnueabihf bcmrpi_defconfig
> make ARCH=armhf CROSS_COMPILE=arm-linux-gnueabihf all
> cp arch/arm/boot/zImage kernel.img
3. Raspbian File system
Use the debootstrap, if you don't have it just install it:
> sudo apt-get install debootstrap
> sudo debootstrap --arch=armhf --foreign --no-check-gpg --include=ca-certificates wheezy rootfs/ http://archive.raspbian.org/raspbian
To finish the debootstrap you should be able to chroot to arm filesystem, user the qemu-user-static package
> sudo apt-get install qemu-user-static
copy the qemu-statuc-arm
> cp /usr/bin/qemu-static-arm rootfs/usr/bin/.
chroot to rootfs and execute following command
> sudo chroot rootfs
> mount proc /proc -t proc
> export LC_ALL=C LANGUAGE=C LANG=Cnow finish up the debootstrap
> ./debootstrap/debootstrap --second-stage
after finished installing filesystem package, add your username and password to enable login.
> adduser raspibian
> password raspibian
add following repository ro /etc/apt/sources.list.
deb http://archive.raspbian.org/raspbian wheezy main contrib non-free firmware rpi
deb-src http://archive.raspbian.org/raspbian wheezy main contrib non-free firmware rpi
Install the gpg key
wget http://archive.raspbian.org/raspbian.public.key -O - | apt-key add -
or
wget http://archive.raspbian.org/raspbian.public.key
apt-key add raspbian.public.key
Do update the package repository
> apt-get update
below is my recommendation package, you may add yours.
> apt-get install sudo vim bzip2 ntfs-3g
add your username to sudoers
> usermod -a -G sudo raspibian
to change to root, just execute this command:
> sudo -i
edit /etc/modules add this modules below to be loaded at boot time
#sound
snd-bcm2835
#i2c
i2c-bcm2708
i2c-dev
#spi
spi_bcm2708
edit /etc/inittab find serial line part, uncomment and modifies like this:
......
# Example how to put a getty on a serial line (for a terminal)
#
T0:2345:respawn:/sbin/getty -L ttyAMA0 115200 vt100
#T1:23:respawn:/sbin/getty -L ttyS1 9600 vt100
....
add a host name on /etc/hostname, you change it with your own name
raspibian
add the hostname to /etc/hosts at the first lines
127.0.0.1 raspibian
127.0.0.1 localhost
......
4. Install Kernel modules
Exit the chroot, To install the kernel modules kernel to your filesystem do
> sudo make ARCH=armhf CROSS_COMPILE=arm-linux-gnueabihf INSTALL_MOD_PATH=
Check the files at
Now you got the a complete base file system. The next step is how to put the raspibian file system into your sd-card.
5. SDCARD
Make at least two partition on at least 2GB sd-card, first ones is dos partition for bootloader with 50MByte size (that's should be enough), and rest were formated with linux ext4 for root filesystem. You may also add small amount of swap space at the end.
To get the bootloader partition to work, first download the firmware of the bootloader section from this link:
https://github.com/raspberrypi/firmware/tree/master/boot
or you may retain a working copy from available Rpi sd-card images.
You'll get these files:
Add these files:
> gedit cmdline.txt
dwc_otg.lpm_enable=0 console=ttyAMA0,115200 kgdboc=ttyAMA0,115200 console=tty1 root=/dev/mmcblk0p2 rootfstype=ext4 elevator=deadline rootwait
> gedit config.txt
# Set sdtv mode to PAL (as used in Europe)
sdtv_mode=2
# Force the monitor to HDMI mode so that sound will be sent over HDMI cable
hdmi_drive=2
# Set monitor mode to DMT
hdmi_group=2
# Set monitor resolution to 1024x768 XGA 60 Hz (HDMI_DMT_XGA_60)
hdmi_mode=16
# Make display smaller to stop text spilling off the screen
overscan_left=20
overscan_right=12
overscan_top=10
overscan_bottom=10
# for more options see http://elinux.org/RPi_config.txt
Now copy kernel.img and kernel_emergency from previous step to this partition. And copy all rootfs files to ext4 partition of the sd-card.
Plug the sd-card, connect the serial to RS232 port (you should build it first), run a terminal with 115200 baud rate and turn the power on. Your Raspibian should be up and running!. Use the previous username and password to log in.
zzzzzzzzzzzz
ReplyDeletepusing
ReplyDeletekeren tutorialnya kaka, makasih
ReplyDeletethis is greate tutor, thanks for sharing
ReplyDelete